
best budget led lights for desk setup usually means one thing in real life: you want your desk to look good and feel comfortable at night, without paying “creator studio” prices.
Budget desk lighting can be genuinely great now, but it’s also easy to buy the wrong type and end up with screen glare, a strip that won’t stick, or a power setup that’s annoying every day. The goal isn’t “more RGB,” it’s usable light that fits your room and routine.
This guide breaks down what matters (brightness, color, mounting, power), where cheap lights tend to disappoint, and how to pick the right type for your desk. I’ll also share a simple plan to install everything cleanly, even if you hate cable management.
What “budget” should still get you in 2026
Price matters, but there are a few basics you shouldn’t compromise on, even in the lower-cost tier. If a product misses these, it often becomes a hassle rather than an upgrade.
- Flicker-free or low-flicker performance: Many people only notice flicker after long sessions. It can be subtle, but it’s real fatigue fuel.
- Adjustable color temperature (ideally): Warm light for late-night, cooler white for focus, or at least a “soft white” mode.
- Reliable adhesive or mounting: The cheapest strips fail because the tape fails, not the LEDs.
- Simple power: USB-C/USB-A to a reliable port, or a clean wall adapter. Weird inline controllers and short leads cause most “daily friction.”
- Decent diffusion: Bare LEDs create hotspots. A simple diffuser can make a $20 light look far more expensive.
According to the U.S. Department of Energy, LEDs are generally far more efficient and longer-lasting than older lighting technologies, which is why even low-cost LEDs can be a sensible choice when the build quality is acceptable.
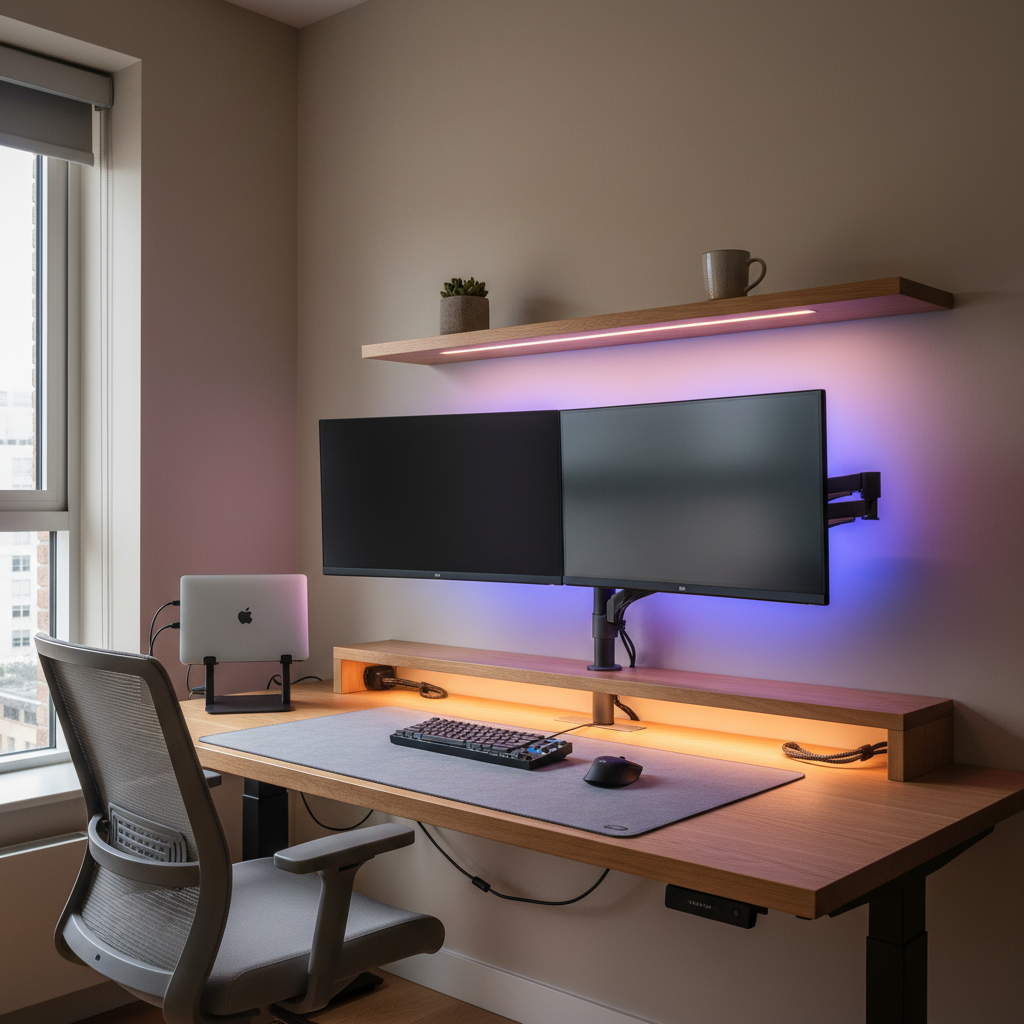
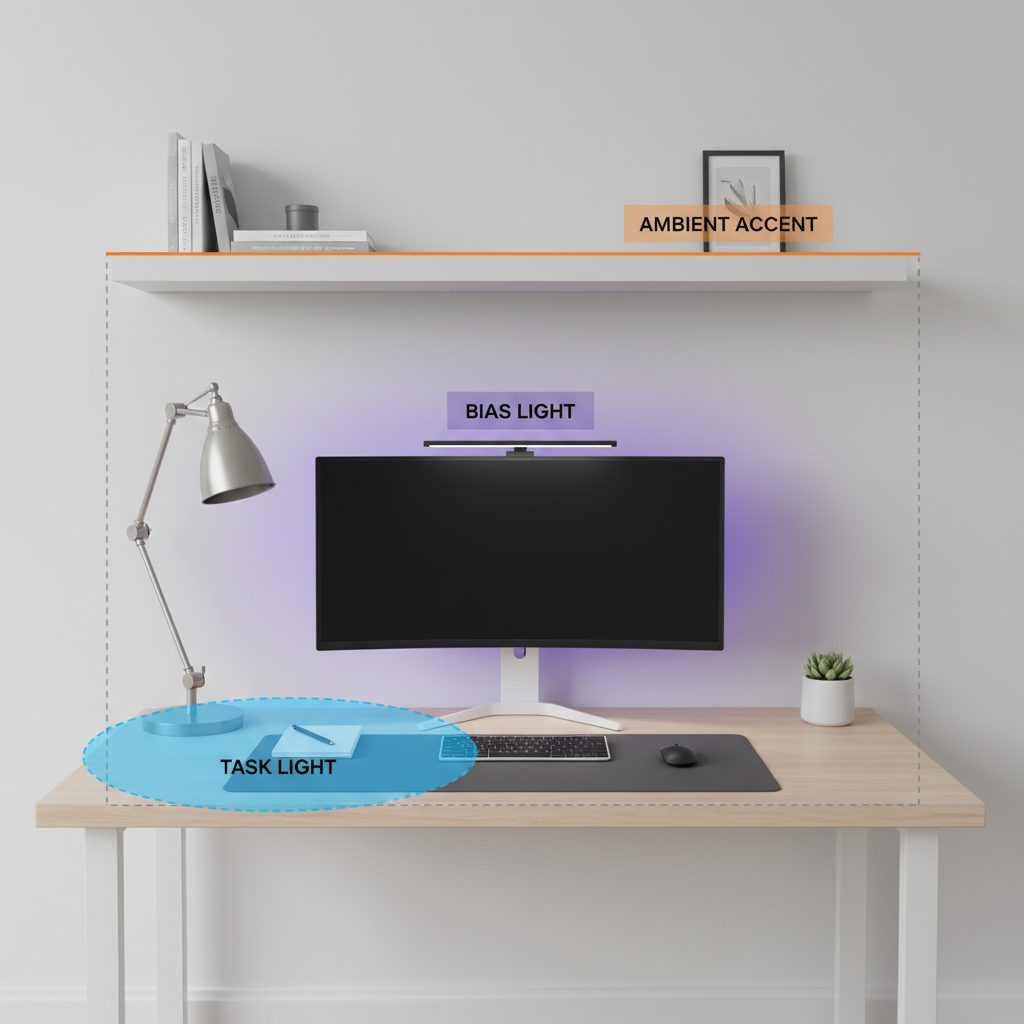
Choose the right type: strips vs bars vs lamps (the “desk zones” approach)
Most desk setups need light in three zones, and you’ll waste money if you buy one product hoping it covers all three.
Zone 1: Task lighting (keyboard, notebook, hands)
- Best budget option: a clamp lamp or small desk lamp with adjustable head.
- Why: you can aim it, control shadows, and avoid lighting your monitor directly.
- Watch-outs: cheap lamps sometimes have harsh beams; look for a wider head or diffused panel.
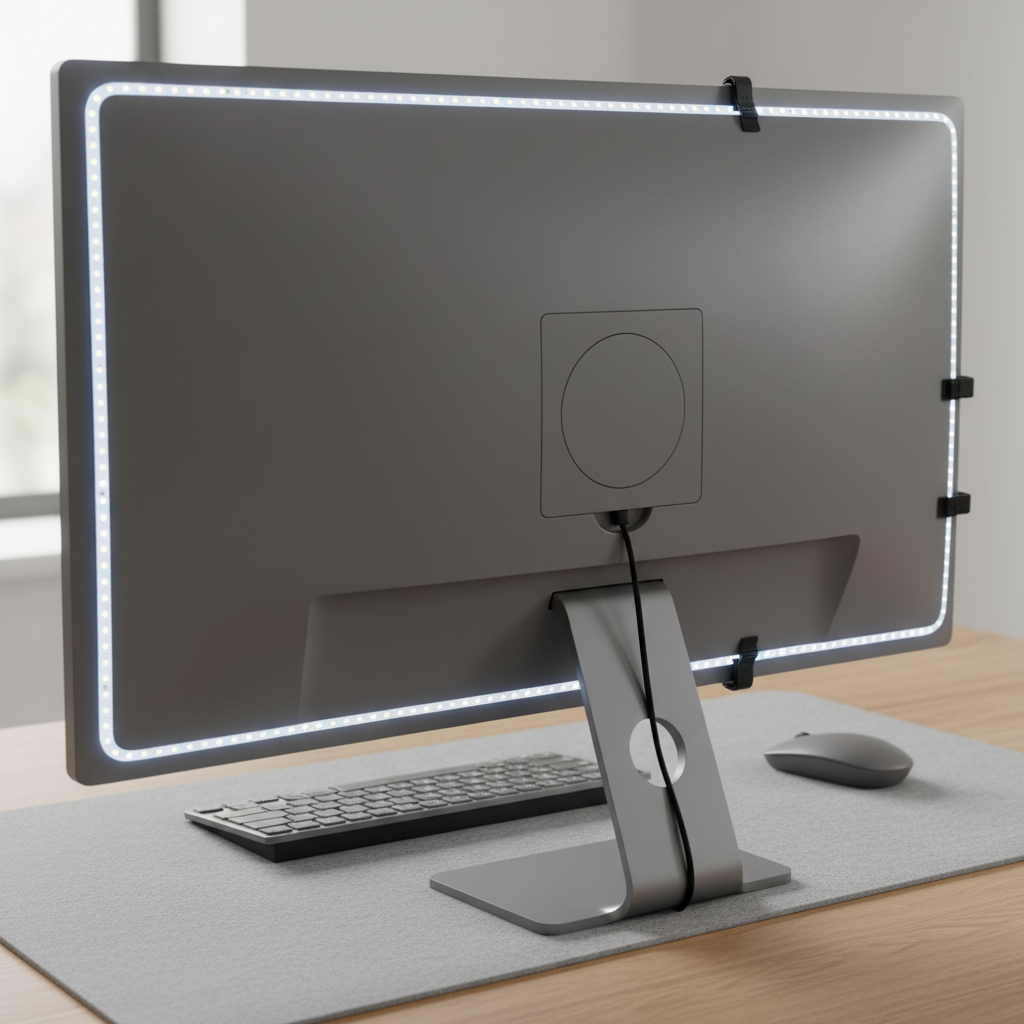
Zone 2: Bias lighting (behind the monitor)
- Best budget option: LED strip behind the monitor.
- Why: it reduces perceived contrast between bright screen and dark room, and makes the setup feel “finished.”
- Watch-outs: poor adhesive and uneven color can look patchy on walls.
Zone 3: Ambient accent (shelves, wall edge, under-desk)
- Best budget option: short strip segments, a small light bar, or puck lights for shelves.
- Why: ambiance is what people notice on video calls and in photos, but it should never blind you.
- Watch-outs: under-desk RGB can reflect off glossy floors and feel distracting.
Quick comparison table: budget LED options for desk setups
Use this as a fast filter before you get lost in specs and reviews.
| Type | Best for | Typical price feel | Common downside | What to check |
|---|---|---|---|---|
| LED strip (monitor back) | Bias lighting, “glow” look | Low cost per effect | Adhesive failure, hotspots | Diffusion, strong tape, USB length |
| Light bar (monitor/top shelf) | Even desk wash | Mid-low | Glare on screen if positioned wrong | Angle adjustment, dimming steps |
| Desk lamp (clamp/gooseneck) | Reading/writing, craft work | Budget-friendly | Small light area on cheap models | Beam width, stable clamp, CCT range |
| Under-shelf LED bar | Keyboard + decor lighting | Budget to mid | Visible dots without diffuser | Diffuser cover, mounting hardware |
| Smart bulb (in existing lamp) | Flexible mood lighting | Good if you already own a lamp | Wi‑Fi/app quirks, not true task light | Brightness rating, warm-to-cool range |
A practical “fit check” before you buy (avoid the usual regrets)
If you do nothing else, run this quick check. Most returns happen because people skip these small details.
- Desk width: 40–55 inches often works with a short bar + monitor strip; longer desks usually need a real task lamp too.
- Wall distance behind monitor: if your monitor sits right against the wall, bias lighting looks stronger but can show LED hotspots.
- Monitor finish: glossy screens show reflections easily, so avoid lights aimed toward the screen.
- Your “late-night mode”: if you work after 9 p.m., prioritize warm dimming and easy controls.
- Power reality: count available USB ports and outlets, then decide whether you need a USB hub or a multi-port charger.
- Mounting surfaces: painted walls, textured desks, and dusty monitor backs make cheap adhesive give up fast.
According to UL Solutions, using certified power supplies and components can reduce electrical risk; for budget LED lights, it’s worth checking whether the adapter or the product listing references a recognized safety certification.
My short list: what to buy for common desk scenarios
Instead of naming specific models that change every season, here are purchase “recipes” that tend to work well in the U.S. market at budget pricing, even when brands rotate.
Scenario A: You want the cleanest look for the least money
- 1× monitor backlight strip (USB-powered, warm-to-cool white or RGB+white)
- 1× small desk lamp (dimmable, wide head)
This combo covers comfort and aesthetics. If you only buy one item, most people get more daily value from a decent task lamp than from RGB alone.
Scenario B: You take calls or stream occasionally
- 1× light bar or diffused LED bar mounted above the monitor or under a shelf
- 1× bias strip behind the monitor for depth on camera
Keep the bar angled down toward the desk, not toward the screen. A tiny tilt mistake creates glare and ruins the whole point.
Scenario C: Small desk, no space for a lamp base
- Clamp lamp with gooseneck or pivot arm
- Short strip on the back edge of the desk or behind the monitor
Clamp solutions are underrated, but check clamp depth if your desktop is thick or has a back rail.
Setup steps that make budget lights look “not budget”
Installation is where cheap lights either feel premium or feel like a dorm room. This is the order that keeps frustration low.
- Test everything before sticking: power it on, cycle brightness, check for dead sections, confirm the controller works.
- Clean surfaces: use isopropyl alcohol on the monitor back or underside of shelves, let it dry fully.
- Avoid direct sight lines: you should not see the LED points from your seated position; hide strips behind edges.
- Route cables with intention: pick one “spine” path down the back of the desk, then branch out.
- Use cable clips: a $5 pack fixes 80% of the messy look.
- Set two presets: bright cool for daytime work, dim warm for late-night. Fewer settings means you actually use them.
If you’re mixing several USB-powered lights, consider a quality multi-port charger instead of feeding everything from your PC. Not mandatory, but it often reduces random disconnects.
Common mistakes (and what to do instead)
These are the issues that show up again and again with best budget led lights for desk setup searches, because people want a quick win and the market is full of “good enough” products.
- Buying RGB strips with no usable white: for actual desk work, you’ll want a decent white mode. If the listing hides white specs, be cautious.
- Over-lighting the wall: strong backlights can be cool, but too bright becomes distracting. Start dim, then increase.
- Placing a bar light too far forward: it can reflect in the monitor. Move it back, angle down, or lower brightness.
- Trusting included tape on textured surfaces: add stronger double-sided tape or mounting clips when the surface isn’t smooth.
- Ignoring heat and airflow: LEDs run cooler than many bulbs, but drivers and adapters can warm up. Don’t bury adapters under fabric.
For eye strain, lighting is only one factor. If you’re getting headaches or persistent discomfort, it may be worth checking your monitor brightness, room lighting balance, and consulting a vision professional for personalized guidance.
Key takeaways (so you can decide fast)
- Task light beats RGB if you do real work at the desk, then add bias lighting for comfort and aesthetics.
- Diffusion and mounting matter as much as brightness in the budget tier.
- One clean power plan (USB hub or charger) feels better than three separate adapters.
- Angle and placement prevent monitor glare more than any fancy feature list.
Conclusion: a budget setup can look premium if you pick the right “mix”
Most people don’t need a complicated lighting ecosystem to get a nicer desk. Start with a comfortable task light, add a simple monitor backlight, then only add ambient accents if you still feel the space looks flat.
If you want one action step today, measure your desk and decide your three zones, then buy the smallest number of lights that cover them cleanly. That’s the easiest path to a setup that feels intentional, not cluttered.
FAQ
What are the best budget LED lights for desk setup if I only buy one thing?
A dimmable task lamp is usually the best single purchase because it improves visibility for typing, reading, and writing. If your room is very dark at night, add a simple monitor bias strip next.
Are LED strips behind a monitor actually useful or just aesthetic?
They can be both. Many people find bias lighting makes the room feel less harsh at night, but you’ll only notice the benefit if brightness is kept moderate and the LEDs aren’t visible directly.
How bright should desk LEDs be for night work?
There isn’t one perfect level because it depends on your monitor brightness and room lighting. In practice, start low, then raise until the desk is readable without squinting, while the monitor still looks comfortable.
Will cheap LED lights cause headaches or eye strain?
They can in some cases, especially if there’s noticeable flicker or the light is overly cool and bright late at night. If discomfort persists, consider adjusting your lighting balance and consult a qualified professional.
Do I need RGB, or should I stick to white LEDs?
For productivity, white light with dimming and color temperature control tends to be more useful. RGB is great for vibe, but it’s worth ensuring the product also has a decent white mode.
How do I keep LED strip adhesive from falling off?
Clean the surface with isopropyl alcohol, let it dry, and avoid textured or dusty surfaces. If it still fails, add stronger double-sided tape or use small mounting clips instead of relying only on the included adhesive.
What’s the easiest “clean cable” power setup?
Many setups feel simplest with one multi-port USB charger mounted under the desk and short cables routed down a single path. It’s not required, but it reduces clutter and makes resets easier.
If you’re trying to upgrade your workspace without turning it into a weekend project, focus on one comfortable task light and one simple bias strip, then build from there only if you still feel the setup looks unfinished.