
How to clean airpods properly for sound quality usually comes down to one thing: clearing the tiny speaker mesh and microphone ports without pushing gunk deeper or damaging coatings.
If your AirPods suddenly sound quieter, less clear, or a bit “underwater,” it’s often not a hardware failure, it’s buildup. Earwax, skin oils, pocket lint, and even dried moisture can block airflow, and AirPods rely on open acoustic paths more than people realize.
This guide walks through what to use, what to avoid, and how to clean each area safely. I’ll also give you a quick way to tell whether cleaning will likely help, plus when it’s smarter to stop and get professional support.
Why AirPods sound gets worse (and what cleaning can fix)
Most “sound quality” complaints are really volume and clarity issues caused by obstruction. Speaker grills and meshes are designed to be breathable, and that also makes them easy to clog.
- Earwax and oils form a thin film over the mesh, cutting treble and detail, sometimes killing bass too.
- Pocket lint packs into the grill holes and acts like a tiny muffler.
- Moisture residue can leave minerals behind, especially after workouts.
- Case debris can prevent good charging contact, which leads to low-battery behavior that people misread as “bad sound.”
Cleaning won’t solve everything, though. If one AirPod is consistently much quieter after you’ve cleaned and reset, you could be looking at a damaged mesh, a driver issue, or a microphone problem that needs service.
Quick self-check: is it dirt, settings, or damage?
Before you start scrubbing, do a fast sanity check. It saves time and helps you avoid “over-cleaning.”
- Compare left vs right: play a familiar track and swap ears. If the quiet side follows the earbud, that points to the bud itself.
- Test with another device: if it sounds bad on multiple devices, settings are less likely.
- Check Balance: on iPhone go to Settings > Accessibility > Audio/Visual > Balance.
- Try a different tip size (AirPods Pro): a poor seal can make bass disappear and make volume feel low.
- Look closely at the mesh: under bright light, you can often see a waxy sheen or lint on the speaker grill.
If you see visible buildup or the sound seems muffled rather than distorted, cleaning tends to help. If you hear crackling, rattling, or intermittent dropouts, cleaning might not be the main fix.

What you should use (and what you should avoid)
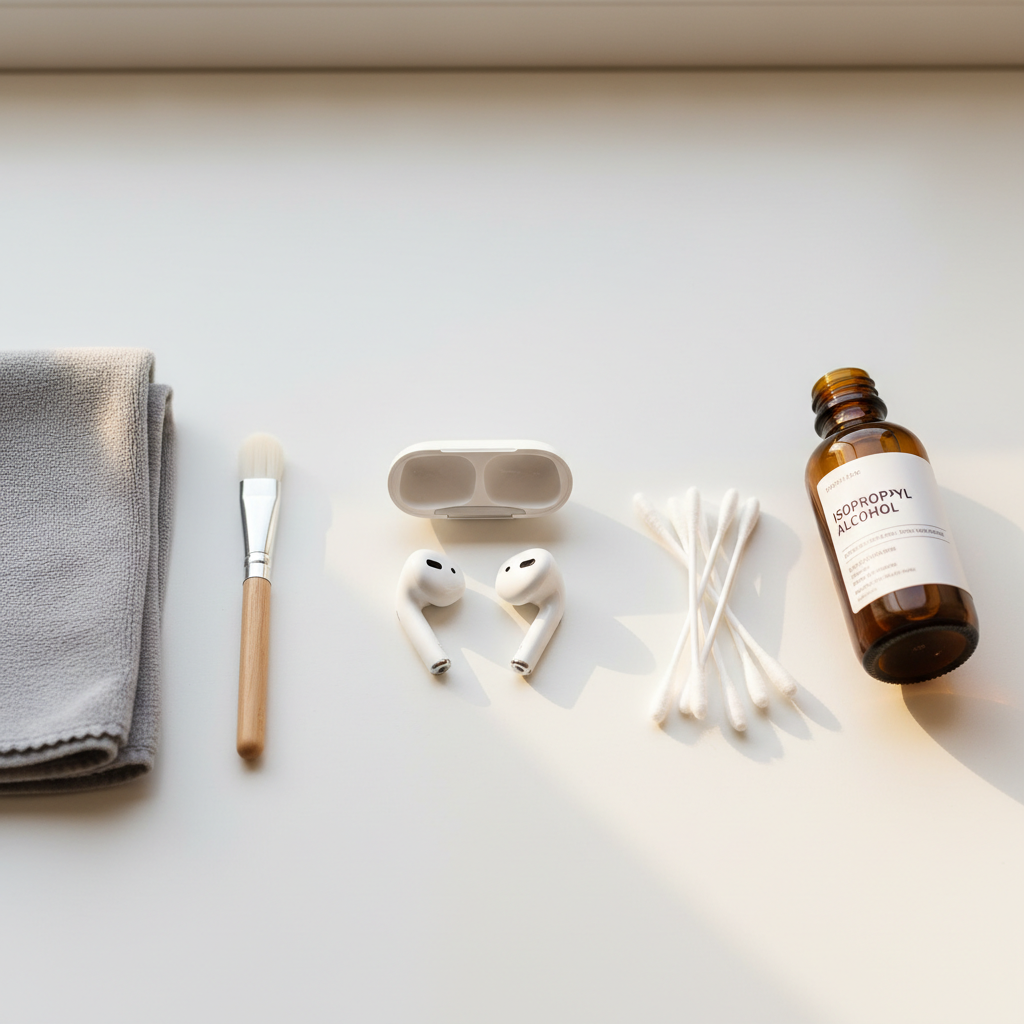
You don’t need a fancy kit, but you do need the right “soft” tools. The goal is lifting debris off the mesh, not forcing it in.
Recommended tools
- Microfiber cloth (lint-free)
- Soft, dry brush (a clean, soft toothbrush works if it’s truly soft)
- Cotton swabs for plastic surfaces (not for poking into mesh)
- Isopropyl alcohol (70%) used sparingly on a cloth or swab
- Wooden toothpick for seams (used gently, never on mesh)
Avoid these (common mistakes)
- Running water or soaking, even “just a little”
- Compressed air (can push wax deeper and stress mesh)
- Metal picks that can puncture mesh and coatings
- Bleach, hydrogen peroxide, window cleaner and other harsh cleaners
According to Apple Support, you should avoid getting moisture into openings and you should not use sharp objects to clean the speaker grills. That guidance matters because once the mesh is damaged, “better cleaning” won’t bring sound back.
Step-by-step: clean AirPods (non-Pro) for clearer audio
Do this with AirPods disconnected from your ears, and ideally with the case nearby but closed so it stays clean.
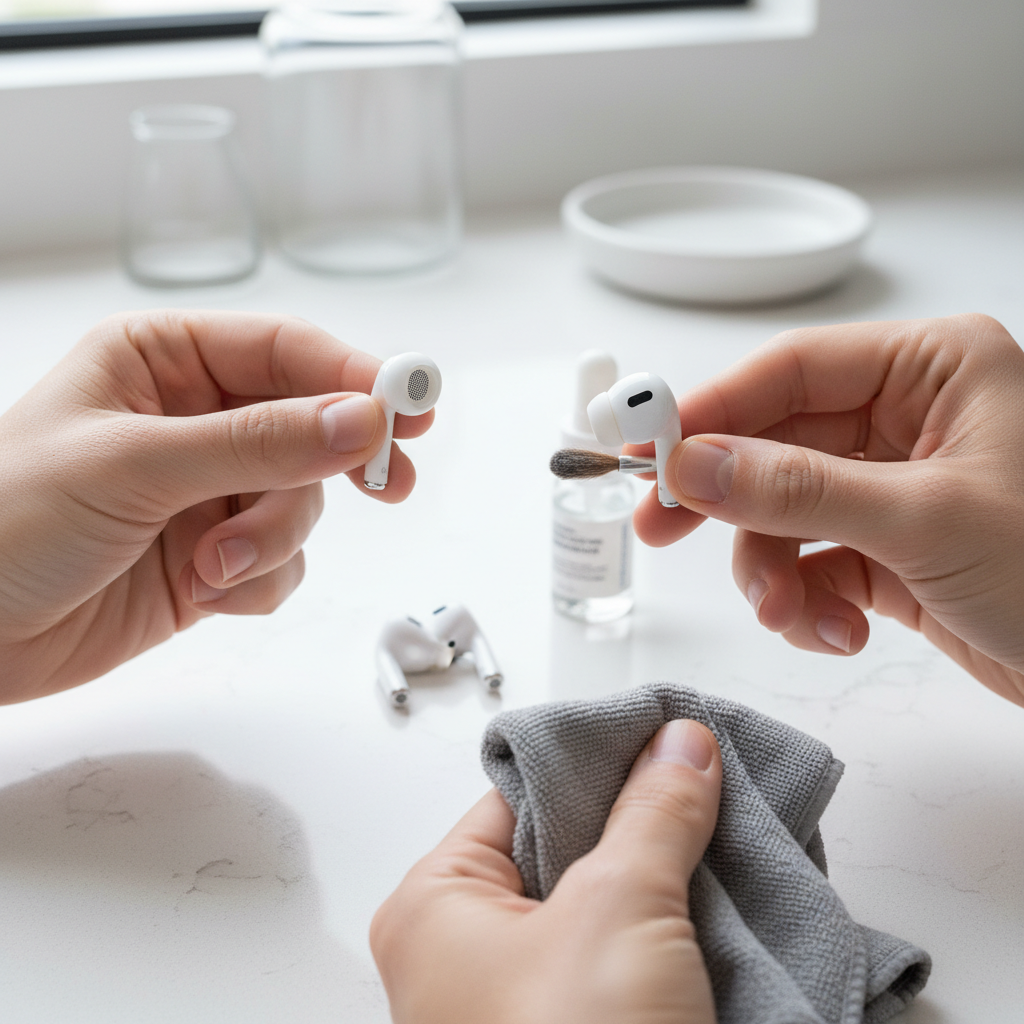
- 1) Power down your listening: pause audio, remove AirPods, and keep liquids away from your workspace.
- 2) Dry brush first: hold the AirPod with the speaker grill facing down, then lightly brush across the mesh. Facing down helps debris fall out instead of in.
- 3) Wipe the body: use a microfiber cloth, slightly dampened with water or a tiny amount of isopropyl alcohol, and wipe the hard plastic.
- 4) Clean microphone ports: brush gently around the small openings. Don’t “dig” into them.
- 5) Let it air-dry: give it a few minutes before putting it back in the case.
If you’re doing how to clean airpods properly for sound quality because one side is quieter, spend extra time on the speaker mesh of that side, but stay patient and light-handed. Aggressive pressure is where people get into trouble.
Step-by-step: clean AirPods Pro (and the ear tips) without ruining the seal
With AirPods Pro, the ear tips are half the sound. A clogged tip mesh or a slippery seal can make everything feel off.
Clean the earbuds (the stem and mesh areas)
- Remove the ear tips by pulling firmly from the base, not from the thin edge.
- Brush the speaker mesh gently with the grill facing down.
- Wipe the hard surfaces with a microfiber cloth; use isopropyl alcohol sparingly if oils are heavy.
Clean the silicone ear tips
- Rinse tips with water only, no soap in many cases can leave residue; if you use mild soap, rinse extremely well.
- Dry completely with a lint-free cloth and let them sit until fully dry before reattaching.
- Inspect the tip mesh and remove visible debris with a soft brush.
According to Apple Support, AirPods and charging cases should not be rinsed under water, while ear tips can be rinsed and must be fully dry before reattaching. If you tend to clean fast and reassemble fast, this is where moisture can sneak into the wrong places.
Don’t forget the charging case (it can cause “bad sound” indirectly)
The case won’t change the frequency response, but it can create problems that feel like sound quality issues: one AirPod not charging fully, random low-battery volume dips, or inconsistent pairing.
- Clean the inside trays: use a dry, soft brush to remove lint.
- Wipe the charging contacts: a cotton swab slightly dampened with isopropyl alcohol works, then let it dry.
- Clean the Lightning/USB-C port: brush gently at the opening. Avoid metal tools that can damage pins.
If you see green or crusty residue on contacts, go slow. In many cases, that’s oxidation or debris, and forcing it can make contact worse.
Cleaning frequency: a simple routine that actually sticks
You don’t need to deep-clean daily. A light routine prevents the “sudden muffled” moment that sends people into panic mode.
| Use pattern | Quick wipe | Mesh brush | Case clean |
|---|---|---|---|
| Occasional listening | Weekly | Every 2–4 weeks | Monthly |
| Daily commuting | 2–3x per week | Every 1–2 weeks | Every 2–4 weeks |
| Workouts/sweaty use | After sessions | Weekly | Every 1–2 weeks |
Key point: if you share AirPods or use them at the gym, cleaning more often is usually worth it for hygiene and consistent audio, but don’t turn it into a harsh chemical routine.
Troubleshooting after cleaning (what to try next)
If you cleaned gently and sound still feels off, try these before assuming the worst.
- Re-seat ear tips (Pro): make sure the tip clicks on fully, an air leak can mimic “no bass.”
- Check Ear Tip Fit Test: on iPhone, Bluetooth > AirPods Pro > Ear Tip Fit Test.
- Forget and re-pair: Bluetooth issues can sometimes present as uneven audio.
- Update firmware: it’s automatic, but keeping iOS up to date helps.
- Try a different audio source: a bad stream or aggressive EQ can trick you.
At this stage, people often re-google how to clean airpods properly for sound quality and attempt a “harder” clean. I’d resist that impulse, if the mesh looks clean and the sound doesn’t improve, force usually causes damage, not clarity.
When it’s time to stop and get help
Cleaning is maintenance, not repair. If any of these are true, consider contacting Apple Support or visiting an Apple Store or authorized service provider.
- Sound is distorted or crackling, not just quiet.
- One side cuts out intermittently even after re-pairing.
- You suspect liquid got inside and audio changed afterward.
- The mesh looks torn, dented, or loose.
Also, if you experience ear irritation, itching, or pain, it may be unrelated to cleaning technique, and it’s reasonable to pause use and consult a medical professional if symptoms persist.
Practical takeaway (so you actually get better sound)
For most people, clearer audio comes from a gentle mesh-first approach: dry brush with the grill facing down, wipe surfaces with a microfiber cloth, and keep moisture out of openings. Add a quick case clean so charging stays consistent, and you’ll avoid a lot of “my AirPods are dying” moments.
If you want a simple action plan, do a 60-second wipe twice a week, and a 2-minute mesh brush every couple weeks, then reassess. If there’s no improvement after careful cleaning and basic troubleshooting, that’s your cue to seek service rather than escalating pressure.
FAQ
How do I know if my AirPods are clogged or actually broken?
If the sound is muffled and the mesh looks waxy or dusty, cleaning often helps. If you hear crackling, rattling, or dropouts across devices, damage or hardware issues become more likely.
Can I use rubbing alcohol to clean AirPods?
In many cases, yes, but use isopropyl alcohol sparingly on a cloth or swab and keep it away from openings. The safer pattern is “lightly damp,” not wet.
Is it safe to use compressed air on AirPods speaker grills?
Usually not a great idea. It can force debris deeper into mesh and ports. A soft brush with the grill facing down is safer and more controlled.
How often should I clean AirPods for sound quality?
If you use them daily, a light wipe a few times a week and a gentle mesh brushing every week or two is a reasonable baseline. Workout use often needs more frequent wiping due to sweat and oils.
Why is one AirPod quieter even after I cleaned it?
It might still have compacted buildup you can’t see, or the issue could be settings (like Balance), a tip seal problem (Pro), or hardware wear. If careful cleaning and re-pairing don’t help, service support is a sensible next step.
Can I wash AirPods Pro ear tips with soap and water?
Water rinse is commonly recommended, and mild soap may be okay if it rinses completely, but residue can affect comfort and seal. The big rule is to dry fully before reattaching.
Does cleaning the charging case matter for audio?
Indirectly, yes. Dirty contacts can cause inconsistent charging, and low battery behavior can feel like “weak sound.” A clean case helps keep performance stable.
If you’re trying how to clean airpods properly for sound quality because the volume drop keeps coming back, you might prefer a small, repeatable routine and the right soft tools, it’s less effort than emergency deep-cleaning and tends to keep audio consistent.